Low Carb Keto Tim Tams
Low Carb Keto | gluten, dairy and refined sugar free recipe
School lunches as a kid meant two tim tams and a milo! These days I am all about a Power Up Mind and Body Brew paired with a Low Carb Keto friendly refined sugar free treaty. I love celebrating old school favourites with a healthy twist, which is why I wanted to share with you, these gluten free, dairy free, refined sugar free Tim Tams that look, taste and slam just like the original! Don't be fooled by the recipe being long, its easier than it looks and reads, trust me, and well worth it!
For hundreds more low carb and keto meals like this get started with my Daily With Luke Program and get delicious easy meal plans and shopping list, along with mindset coaching, a inspiring articles, daily 10 minute moves and so much more. Find out more information here.
Note: For these to be low carb keto you will need to utilise a sugar substitute and I highly recommend Lokanto Monk Fruit Sweetener which is available in most Coles and Woolworths stores and online. Otherwise simply use good quality honey, maple syrup or coconut nectar for a paleo version.


- Ingredients
For the Cookie
100 grams almond meal
80 grams coconut flour
40 grams raw cacao powder
pinch of salt
3 tablespoon coconut oil
1 tablespoon Luke Hines by Cocolife MCT Keto Tonic
2 eggs
40 grams/ 2 tbs Lakanto Maple Flavored Syrup or Golden Lakanto Granulated Sugar or honey, maple or coconut nectar
For the Chocolate Cashew Cream250 grams/ 2 cup raw cashews, soaked for 30 minutes
200 grams/ 4 heaped tablespoons coconut cream
1 tablespoon Luke Hines by Cocolife MCT Keto Tonic
45 grams/ 2 tablespoons raw cacao powder
40 grams/ 2 tablespoons Lakanto Maple Flavored Syrup or Golden Lakanto Granulated Sugar or honey, maple or coconut nectar
For the Chocolate Coating
2 cups cacao butter or coconut oil
2 cups raw cacao powder
60 grams/ 3 tablespoons Lakanto Maple Flavored Syrup or Golden Lakanto Granulated Sugar or honey, maple or coconut nectar - Method
Preheat your oven to 160C and line a large baking/ cookie tray with baking paper.
Get started with your cookie biscuit by combining the almond meal, coconut flour, cacao powder and a pinch of salt in a food processor and pulse until combined. Now add in the coconut oil, MCT Keto Tonic, eggs and sweetener of choice and blitz until it all comes together into a dough, it may even form a ball in the food processor. If not, you want your mixture sticky enough to stick together and roll into a ball, out onto the bench.
Roll your mixture into a dough ball and flatten out on some baking paper on the bench using a rolling pin until about 5cm thick. Once nice and even cut your flat dough into rectangles the approximate size you would like your tim tams to be. I did quite big ones, so that I would have big hand held super sized tim tams. You need to cut them in pairs.
Place your prepared rectangles onto your prepared baking tray and bake for 10 to 15 minutes in the oven until firm and crispy around the edges. Upon cooking them, remove from the oven, transfer to a wire rack and cool completely.
Whilst they're cooling, get started on your cashew cream. In a food processor combine all of the listed ingredients required and blitz until really well combined, smooth and creamy. It should be thick and spreadable. Not to mention, delicious. Try not to eat too much of it now.
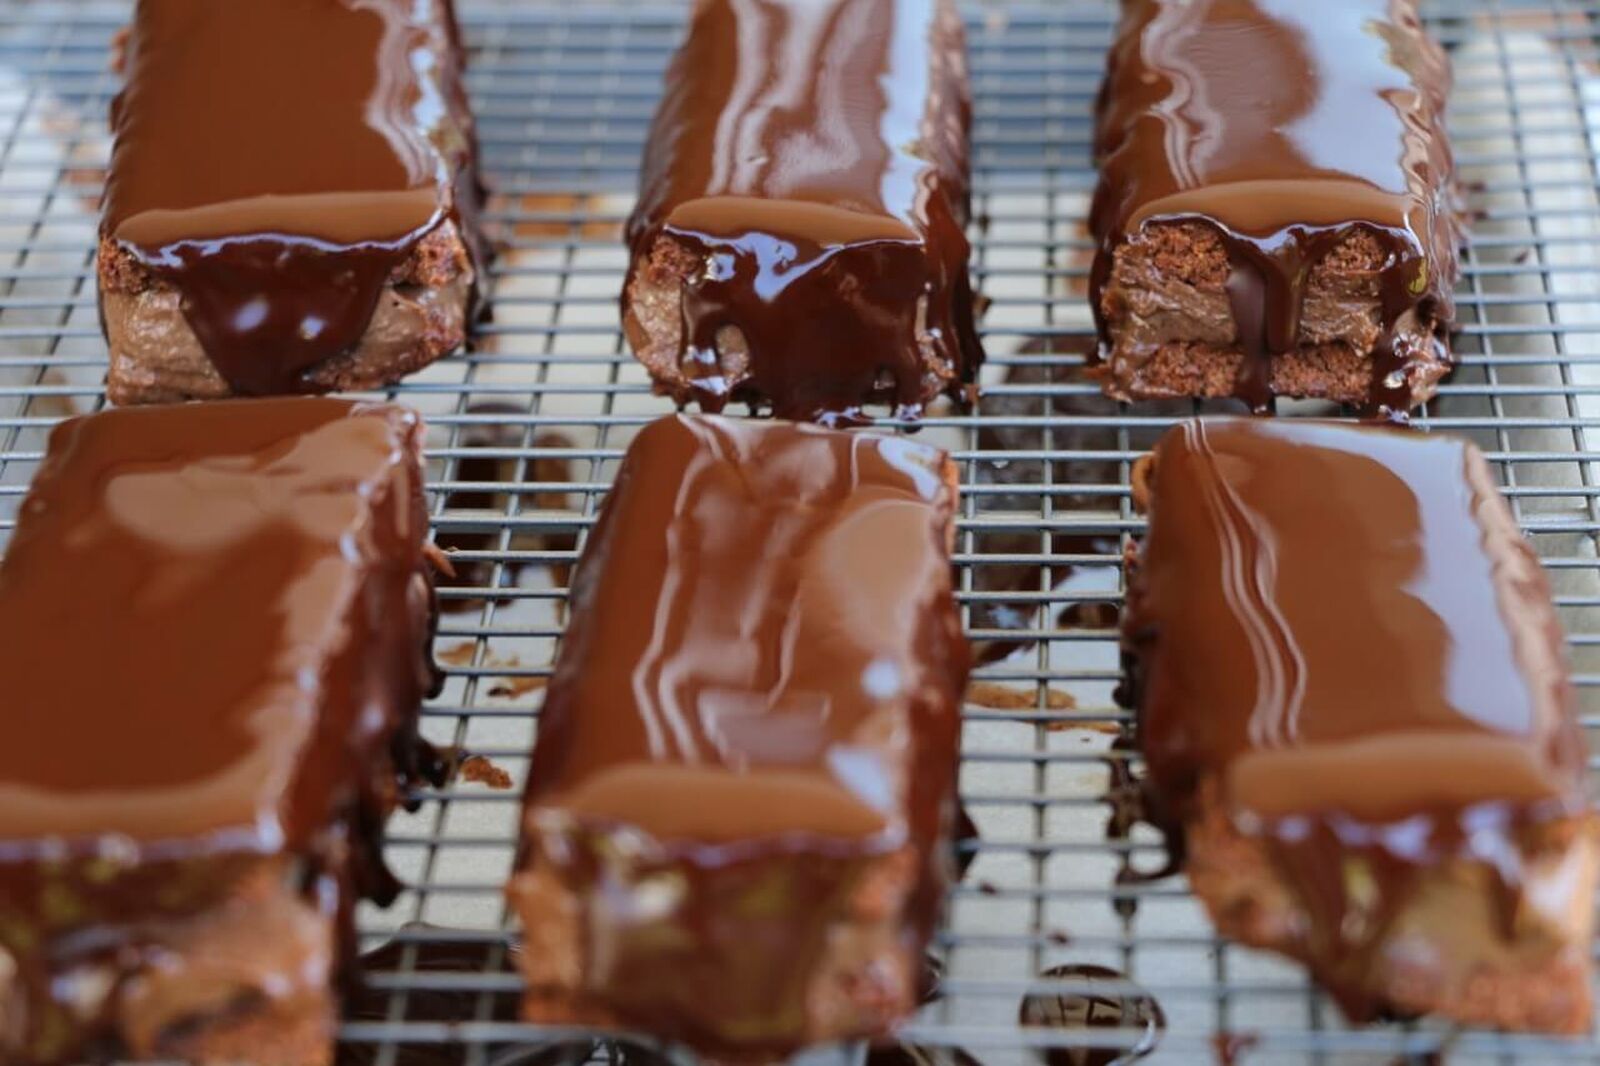
On a fresh baking tray lined with more baking paper, place one rectangle cookie down, spread generously with the chocolate cashew cream, and top with another rectangle cookie and press slightly so the cashew cream fills right out to the edges. You can use your finger to smooth the outside edges too for the perfect shaped tim tam. Repeat with remaining cookies and mixture and then place these in the fridge or freezer to firm up. You want the outside of it to be really cold so that when you pour the chocolate mixture over the top, it sets quickly and doesn't melt your cashew cream centre.
Whilst your cookies are keeping cool, get onto making your chocolate! In a saucepan over low to medium heat, simply combine the cacao butter (or Incredible Coconut Oil), raw cacao power and sweetener until all is melted down so its runny, smooth and creamy. Remove from the heat and allow it to cool slightly so that it isn't super hot when it comes time to pour over your cookies.
When the cookies are nice and cold and set, and your chocolate has cooled down a little, its time to get pouring. Using a spoon, pour your chocolate over the top of each prepared cookie cream sandwich and make sure all sides get a good coating as it falls down the edges. You can do a few layers, and I sometimes like to set one layer in the fridge, then pour more over to create a really thick, chocolate coating. You don't need to pick them up whilst doing this process as the sides naturally get a good covering from all the drips over the edge of the top.
Set them back in the fridge for 30 minutes or so and then they are ready to enjoy!

Join my brand new program!
DAILY WITH LUKE
Join over 5,000 members who have transformed their health and happiness with guidance and support from me and my expert team every step of the way!